
A mind map is an excellent tool for organizing your thoughts and manifesting them in a tangible form. While you can create one on paper, using a digital tool offers several benefits. In this guide/tutorial, I will you how to create a mind map using Miro and share some helpful tips along the way.
How to Create a Mind Map in Miro
You can find the mind map tool in the Creation Toolbar on the left side of the board. If it’s not there, click on “More Apps” at the bottom of the toolbar and search for “mind map.” For convenience, pin and attach the mind map app to your toolbar for future use.
To start:
- Click on the Mind Map tool and choose a template, or
- Drag a mind map from the icon to the board.
I prefer the second option, as it's quicker and lets you start from scratch without having any placeholder nodes dangling from your mind map.
Kickstarting Your Mind Map with AI
What I’m showing you here, might be one of the strongest reasons to use Miro for creating mind maps. For a couple of months, you can now create and expand mind maps with Miro Assist, an in-built AI feature. And it’s ridiculously cool. Here’s how to do it:
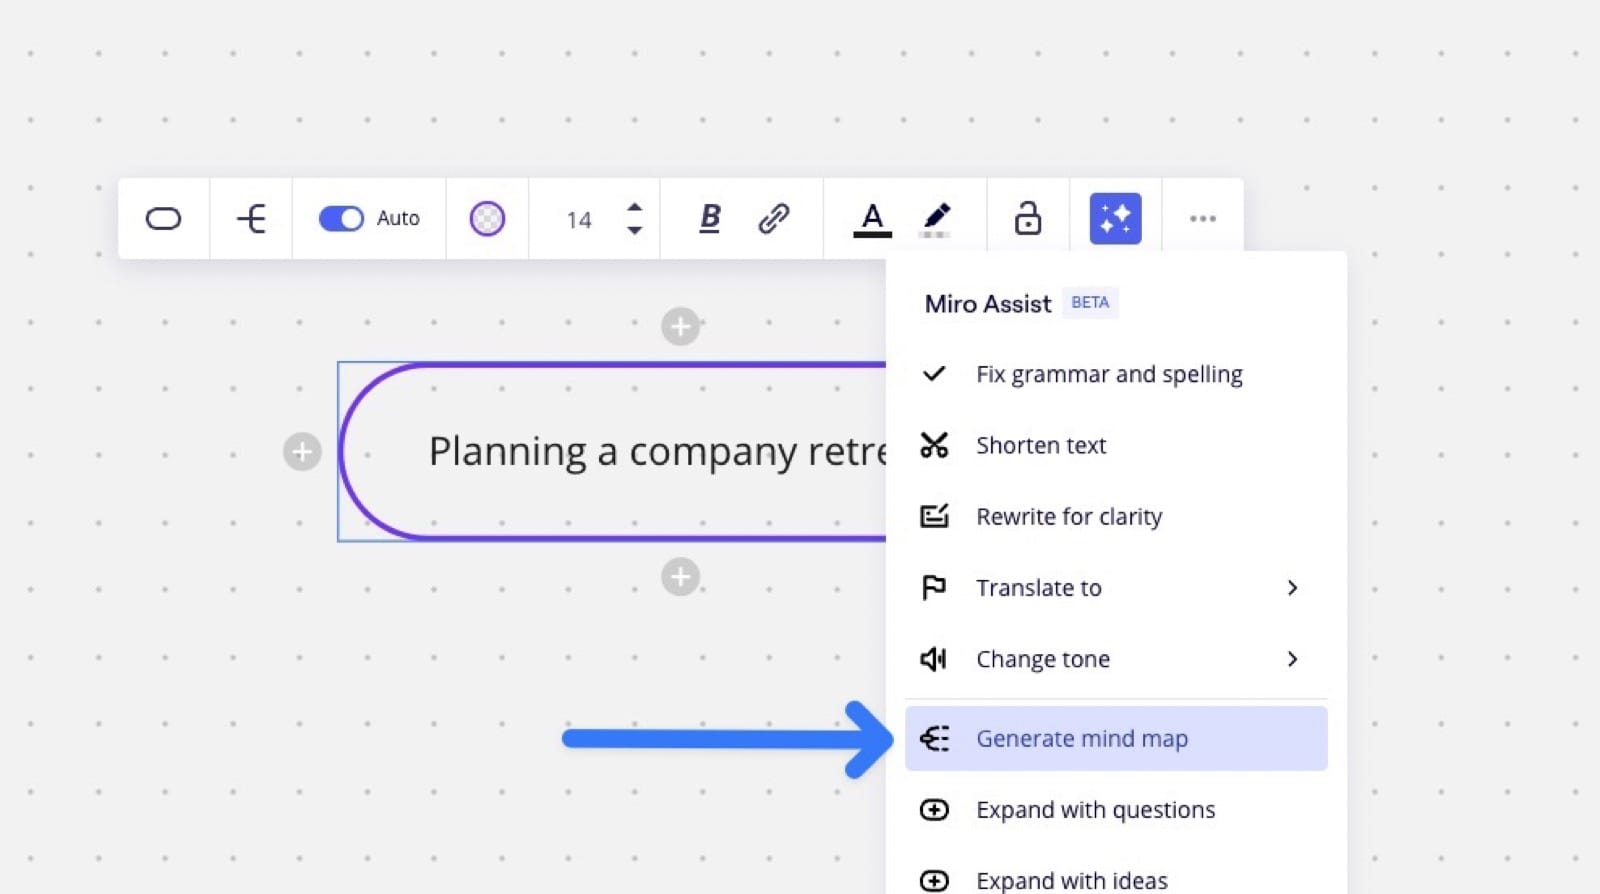
- Add your main topic to the starting node.
- Click the "Miro Assist" icon, then select "Generate mind map."
- Wait a moment, and a full mind map should appear!
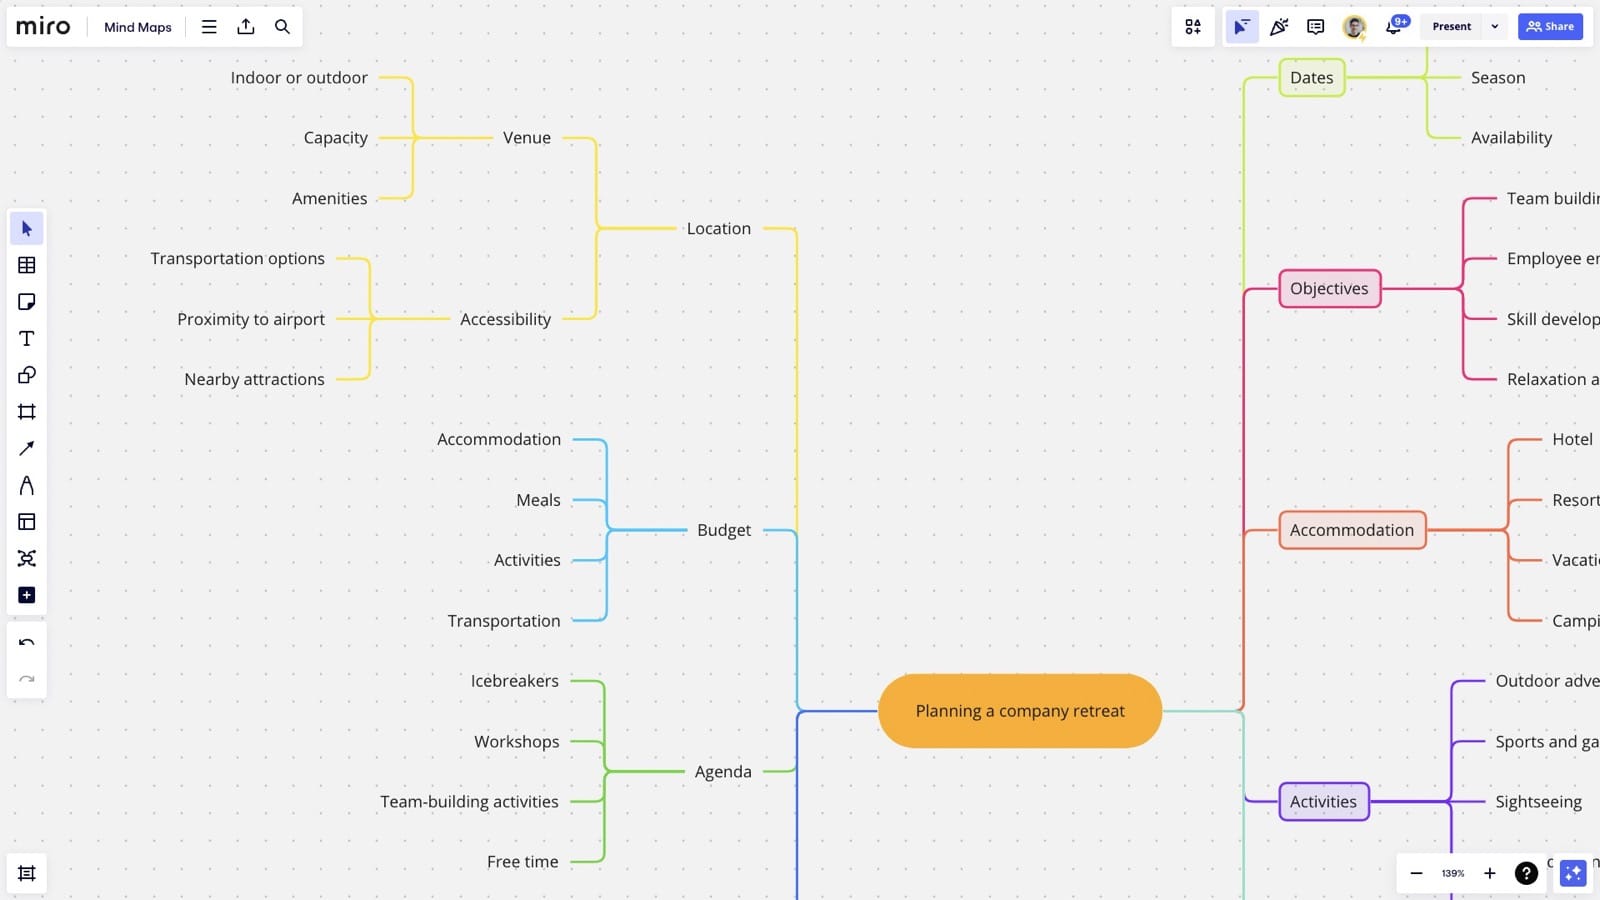
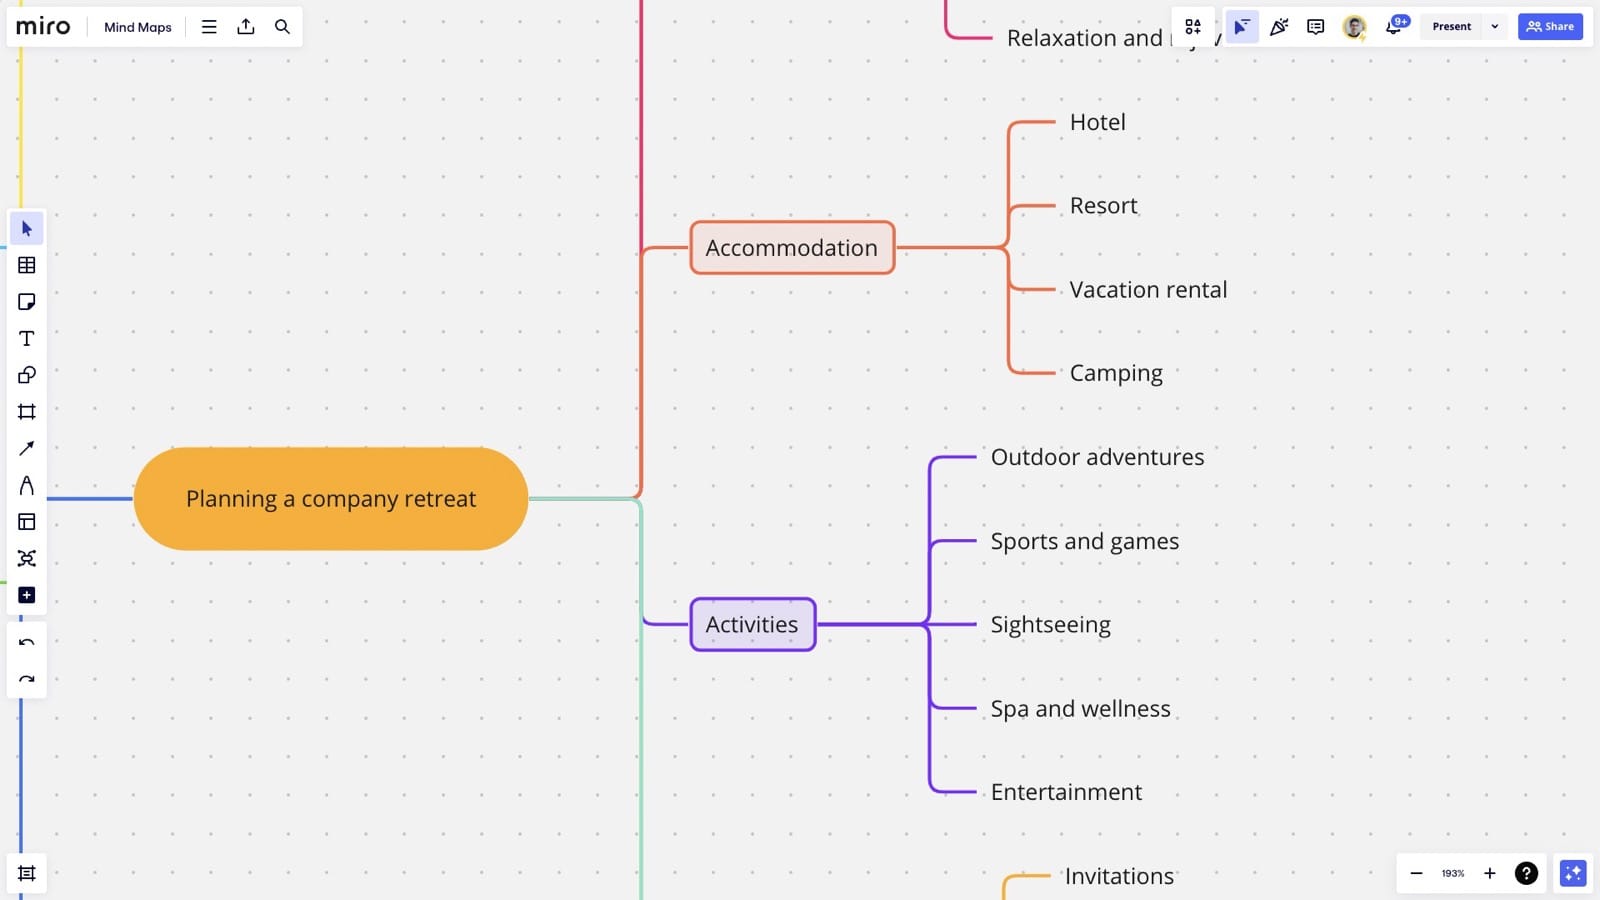
For instance, I made an AI mind map on “Planning a company retreat.” The AI suggested subtopics like location, budget, and agenda. This isn’t perfect, but gives me a starting point to work from and to speed up my process.
To further refine your mind map with AI, select a node, click the assist button again, and choose to expand it with ideas, questions, or topics. This is useful for brainstorming specific parts of your map, like team-building activities for a retreat.
Mind Map Styling Options and Tips
The larger the mind map, the more important it becomes to style it in a way that’s not only visually appealing but also functional. So, let’s walk through the options we have here and some of my tips on how to best style your mind map.
Node Type and Style
You can change the node type to a square, rounded square, or pill-like shape and then further adjust the color and styling of the outline.
Quick tip: Use a solid color and pill shape for the starting node. Then, use different colors for each child node, setting all direct children of the starting node to a rounded square shape with a light background to clarify the hierarchy.
Theme and Connection Lines
Here, you can choose between rounded and angled connections, as well as a top-to-bottom layout or left-to-right.
Quick tip: Left to right for me is more logical, but there might be occasions where you use the top-to-bottom (such as an organigram). And when it comes down to the connection line, I prefer the angled connection lines since they are a bit easier to follow in my eyes.
Auto Layout
The auto layout feature is brilliant for keeping large mind maps neat and organized. What I like most about the auto layout, is that you can quickly move around nodes and reorganize the order of the nodes, without them overlapping.
Quick tip: Keep auto layout on. I would only switch it off, when I need to shape the mind map myself (e.g. to better connect individual nodes, or add other elements in between, such as images).
Collapsing and Connecting Nodes
When you click on a node with child nodes, you can click the minus icon to collapse the node. This is helpful to quickly hide away parts of the mind map that are not needed.
To add connection lines between nodes, look for the light blue dot on one of the sides of a node and drag it out to another node. This creates a connection line, where you can also add an arrow or text in between.
Quick tip: You can also quickly move nodes to other nodes by selecting them and dropping them on to another node
Sharing a Mind Map
Miro provides several sharing options:
1. Sharing a Link
Create a frame around your mind map, then select it and click “Copy Link” from the three dots in the context menu.
When someone opens this link, Miro immediately brings that mind map into view. Which is pretty handy if the mind map is part of a bigger board.
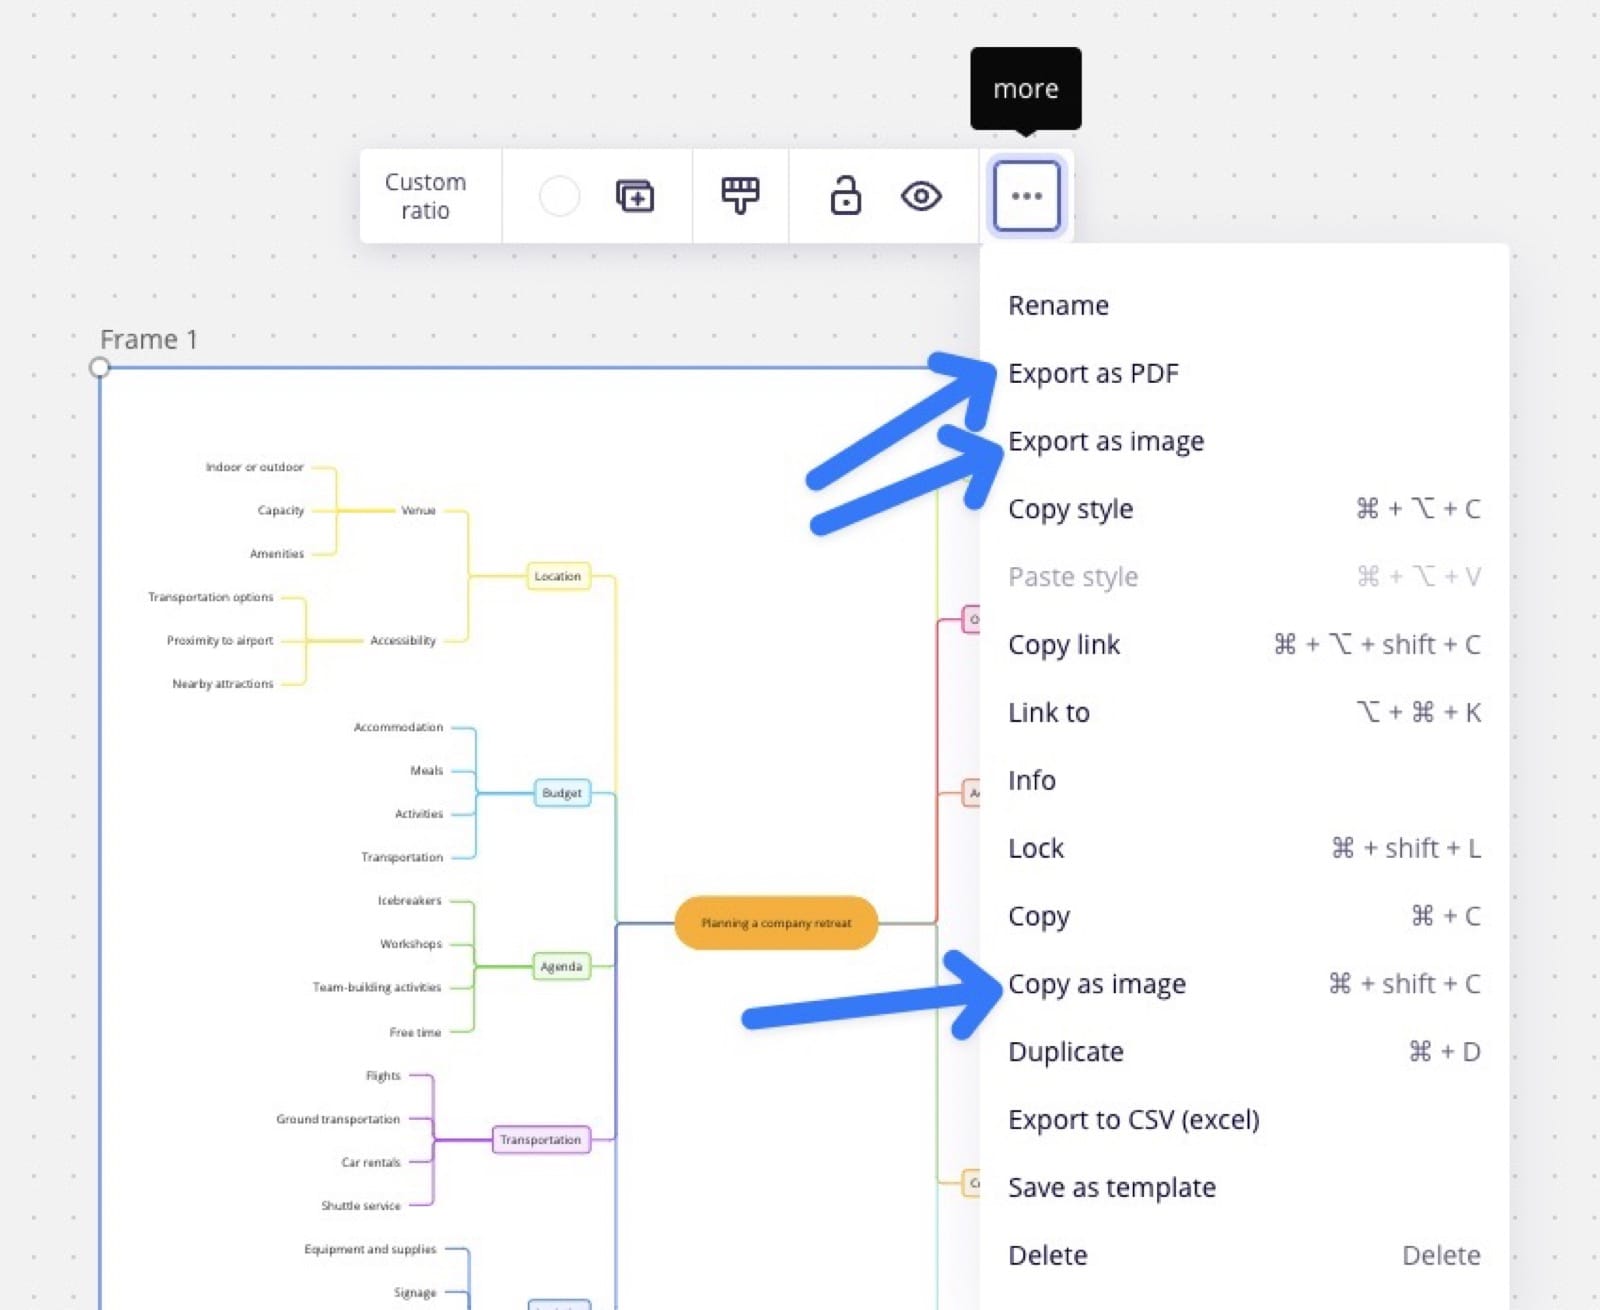
2. Export Image or PDF
This is a Miro tip you might not know: For all elements on a board, you can click on the three dots in the context menu and then click “Copy as image” to save that element to your clipboard. This is a great way to click copy a mind map and share it in a team chat or through email.
If you are looking for a higher-quality export, select the frame and click “Export as PDF” or “Export as image” in the context menu. The PDF will be vectorized, meaning you can zoom in and out indefinitely. The image is not vectorized, but can export it at a very high resolution to still keep it sharp.
3. Export as CSV
If you plan to work with the mind map data, you can also export the whole mind map as a CSV using the Mindmap Downloader App. This small app, allows you to quickly export the mind map and bridge your work from Miro to tools like Excel or Google Sheets.
Summary
Miro's mind-mapping tools offer a dynamic way to organize thoughts, plan projects, and collaborate with others. By leveraging its AI features, customization options, and sharing capabilities, it makes it really easy to work with mind maps.


