Sticky notes are at the heart of the online whiteboard tool Miro. They are great for brainstorming ideas, capturing tasks, and visually arranging information.
In this article, we are going to highlight the best sticky note tricks that we picked up at Facilitator School over the last three years.
Here is what you can learn:
1. The fastest way to create new sticky notes in Miro
Miro offers multiple ways to create new sticky notes. You can drag them from the sidebar, double-click on the board, or just duplicate existing sticky notes. Great if you only need to create one or two sticky notes. But these methods can become distracting if you want to create multiple sticky notes in succession.
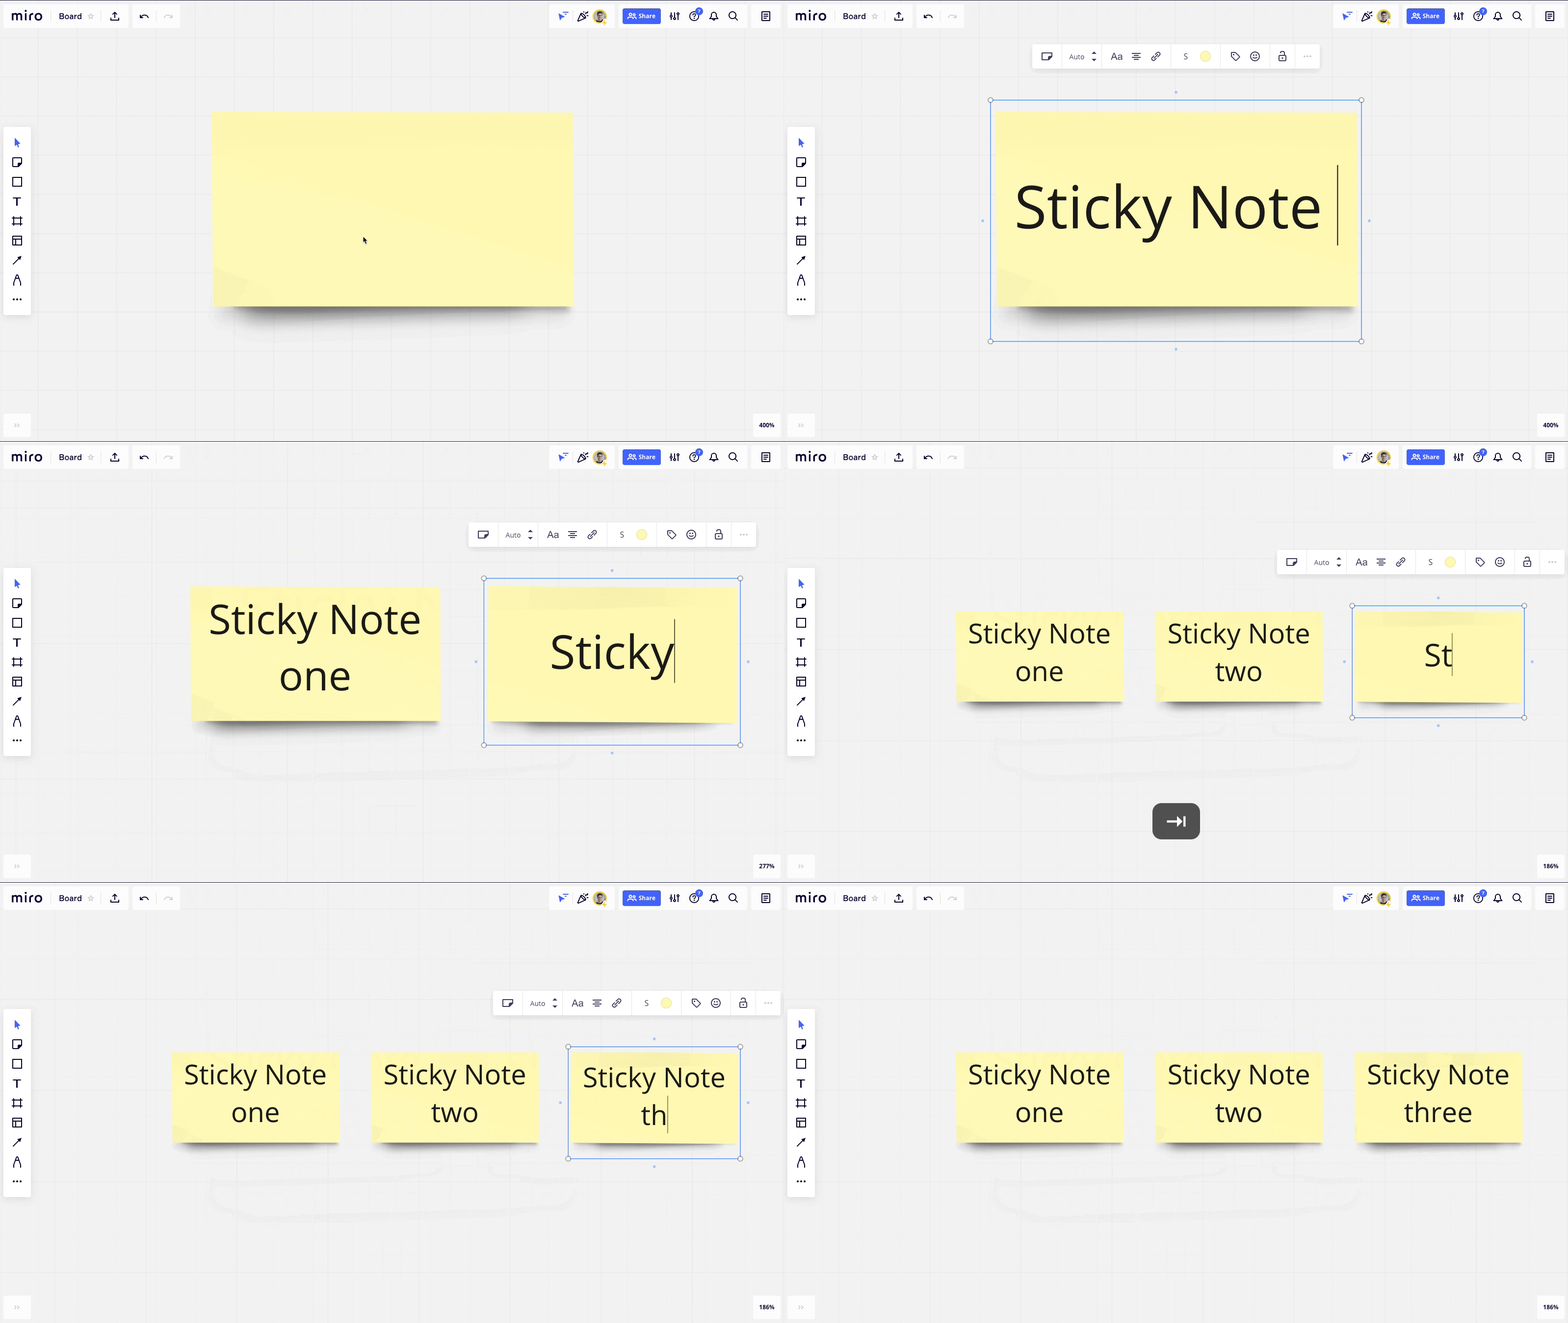
There is a better way to create multiple sticky notes in a row by using the "Tab" key on the keyboard. For this to work, you need to click on a sticky note until you see the blinking cursor. Once you are in writing mode on the sticky note, just press "Tab". Miro will then automatically create a new sticky note of the same size and color on the right side and shift your writing focus to the new sticky note. So you can just keep on writing and creating sticky notes at lightning speed!
2. Bulk import multiple sticky notes using Google Sheet or Excel
Let's say you want to create a Miro board, with one named sticky note for every employee of your company. And unfortunately, there are 300 people in your company. Urgh. How can you avoid creating 300 sticky notes all by hand?
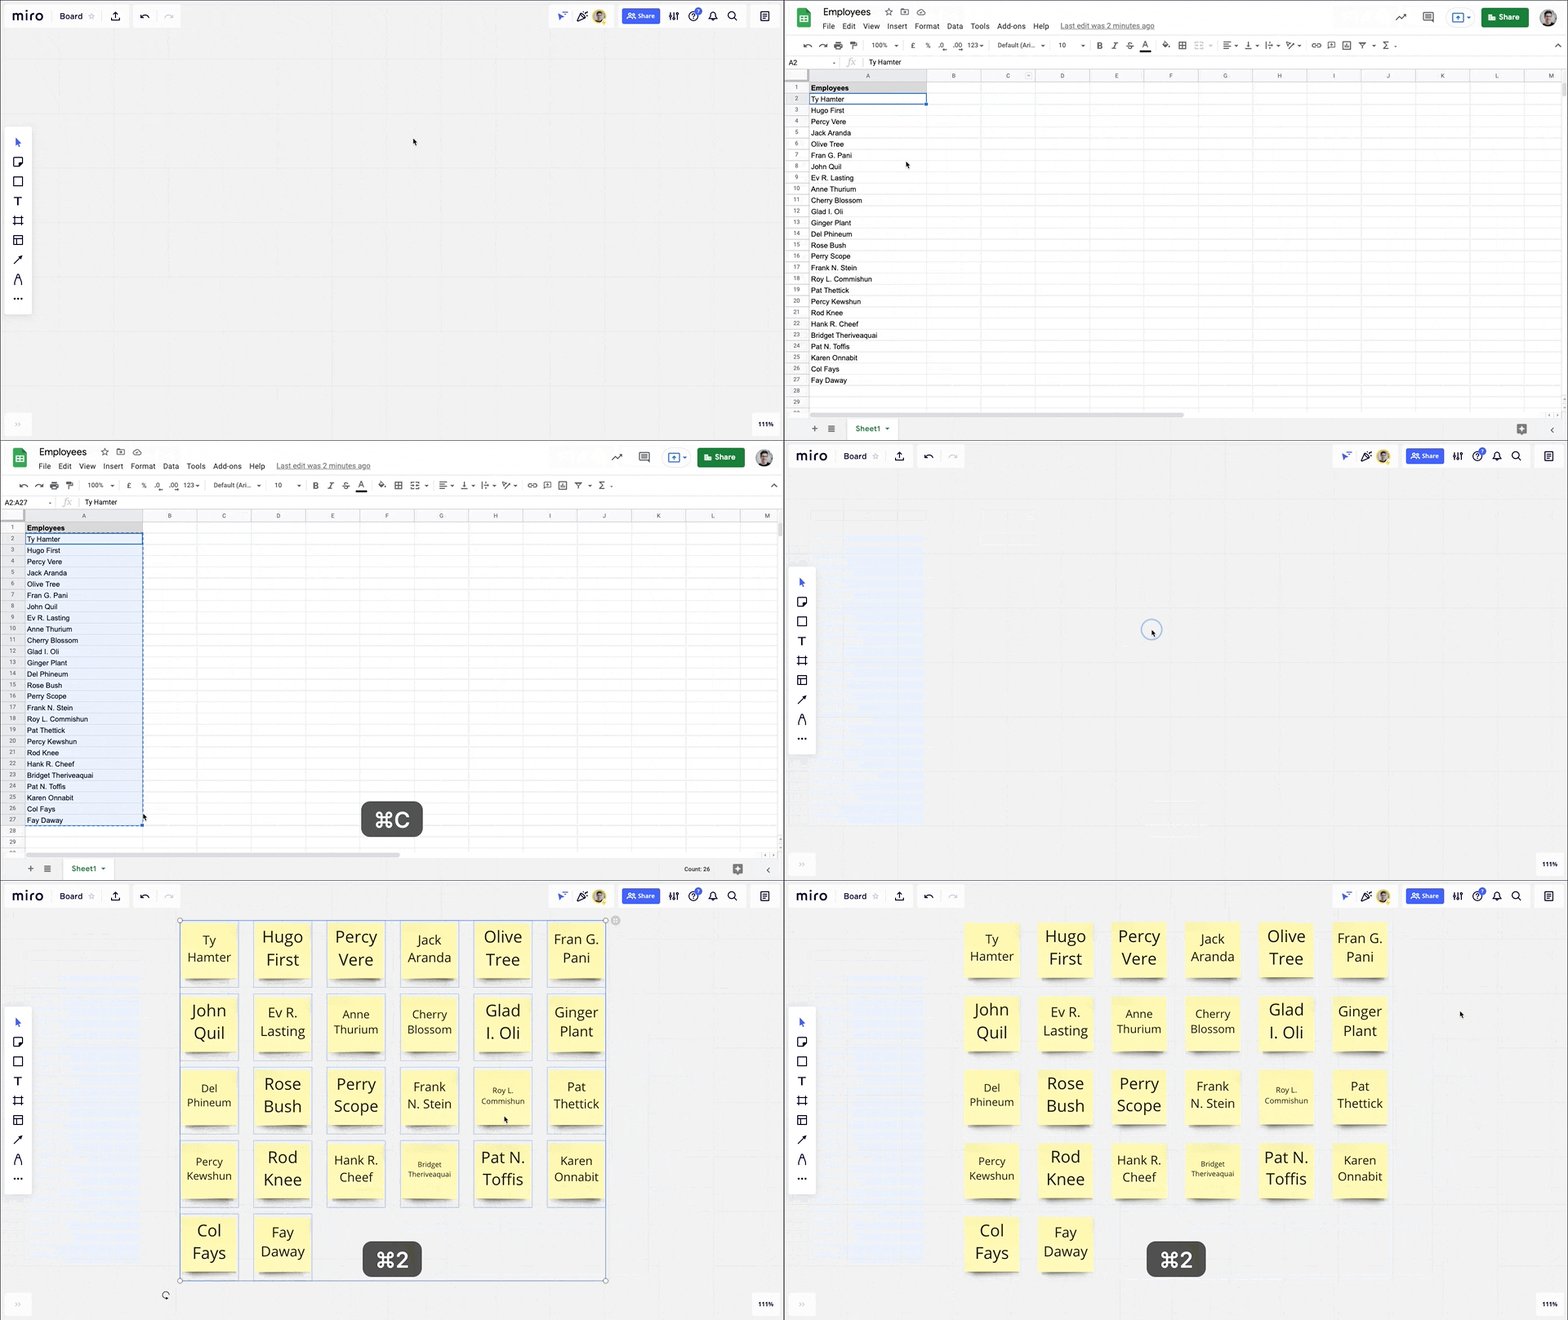
The best way to solve this is to call Google Sheet or Excel for your help. Create a new sheet with the name of all employees. Then select all cells that you want to turn into sticky notes. Now, just copy all cells and paste them into the Miro board. Voilà! All cells should be turned into sticky notes. The perfect solution for every time you need to bulk create a lot of sticky notes.
3. Bring order to your sticky notes by using the "Auto layout" feature
When working with sticky notes, it's a good idea to always keep things tidy. Especially when you work in a larger group. If you are not careful, people will create sticky notes all over the place and the board will quickly turn into pure chaos.
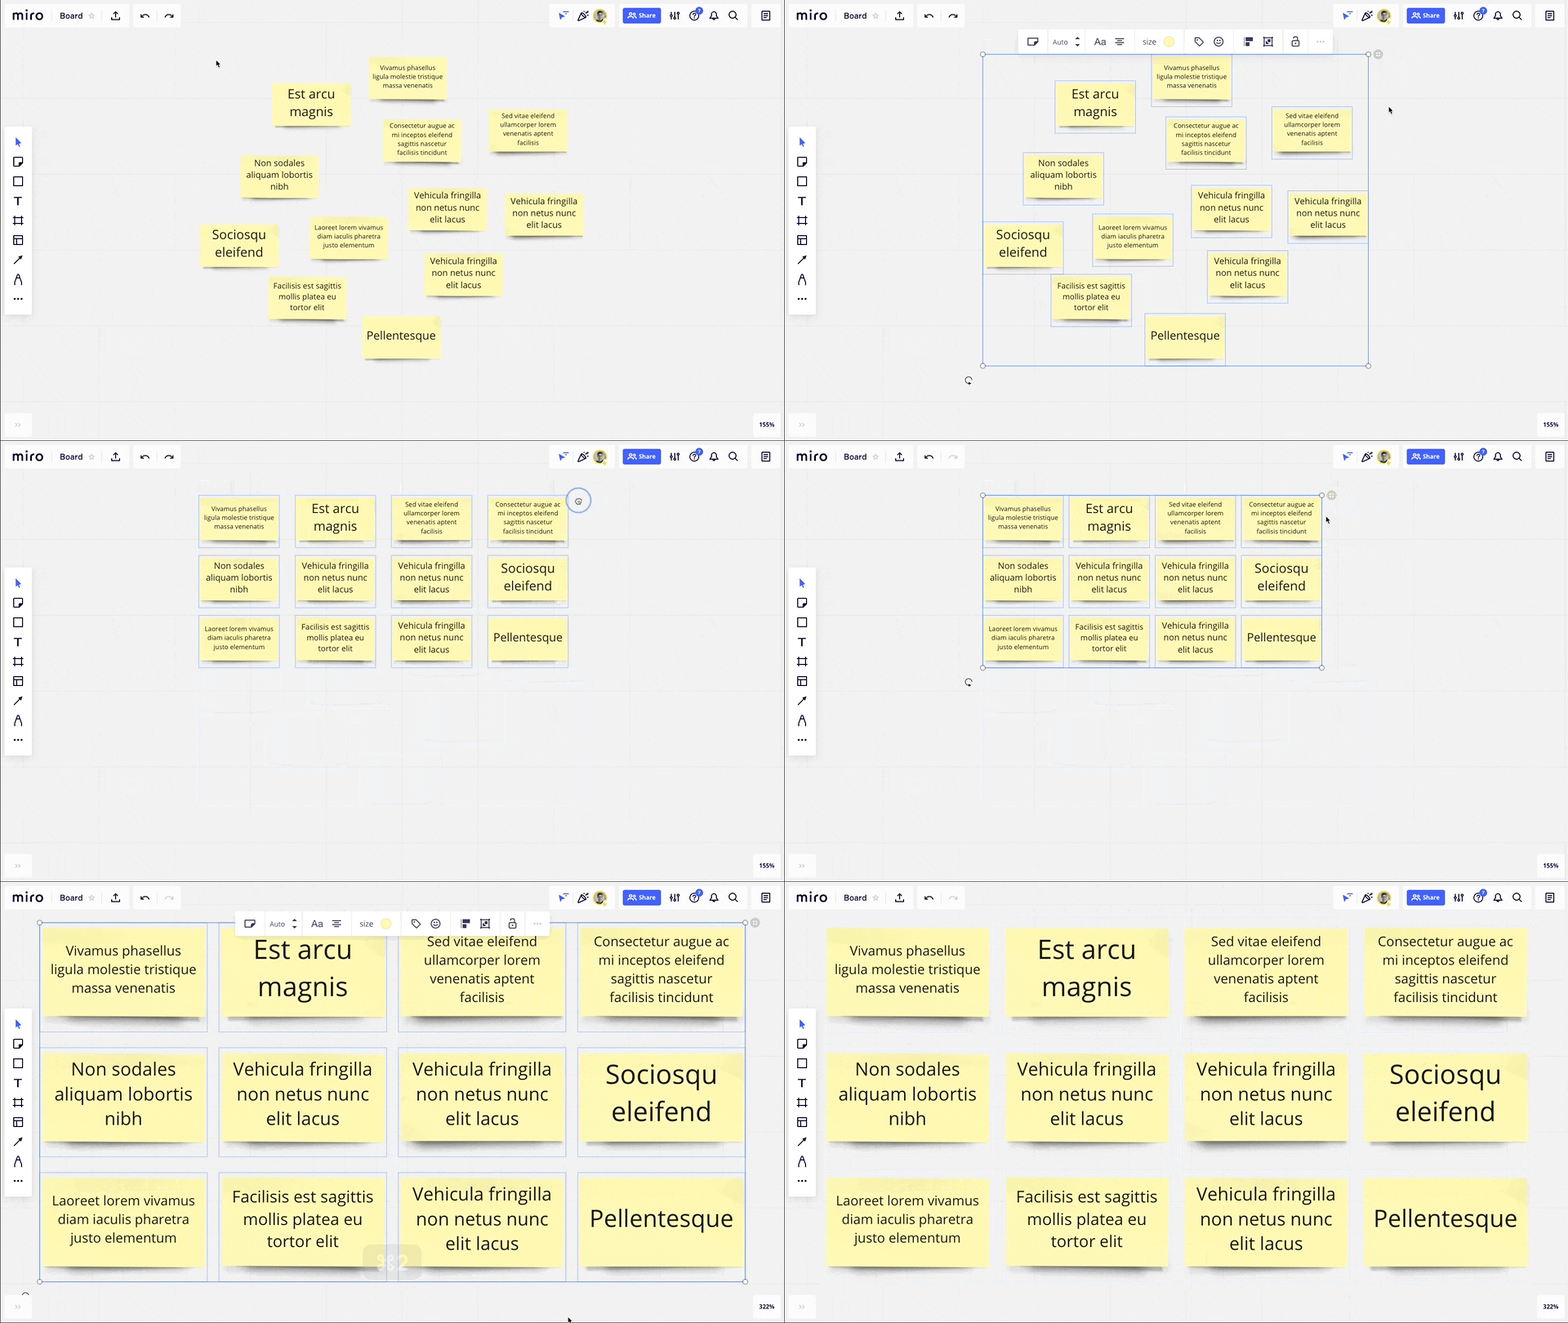
Luckily, Miro offers a fast and easy way to organize and align groups of sticky notes. Simply select a group of unordered sticky notes and look for the handle with the four dots in the top right corner of your selection. Then click and hold the four dots and move your mouse. Miro will automatically organize all the sticky notes into perfectly aligned rows and columns. It's so satisfying, you need to try it yourself. You can learn more Auto Layout and other ways to structure a board in this article.
4. Quickly find the right sticky notes using Miro's board search
When you are looking for an individual sticky note, it can sometimes feel like you are searching the needle in a haystack. Zooming in and going from sticky note to sticky note is time-consuming and can quickly become frustrating.
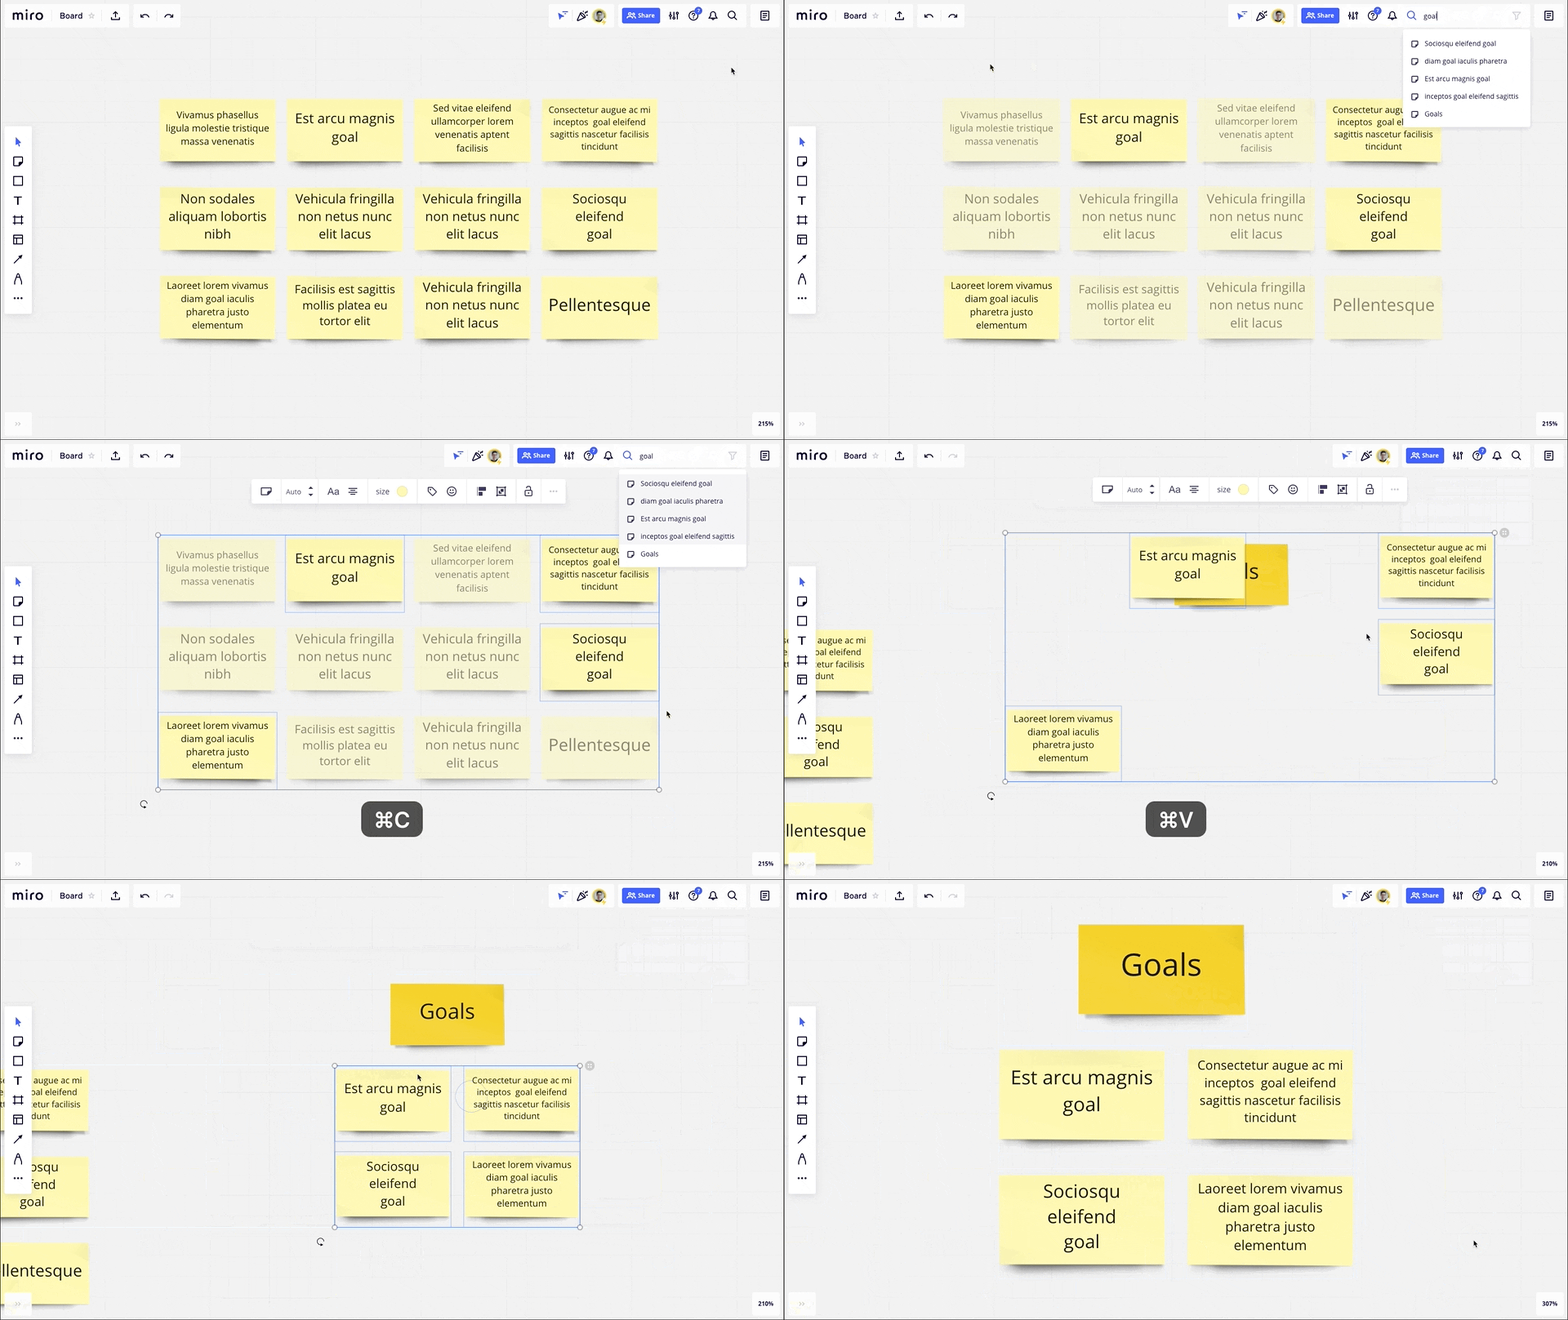
Not everyone knows this, but Miro actually offers a pretty powerful board search. To open the search, either press CMD + F (Mac) or STRG + F (Windows) or click the search icon in the top right corner of the board. Once you are there, simply search for a word and Miro will highlight all relevant sticky notes that contain that word.
From there, you can press ENTER to bring the widgets from the search result into one view. If there are many sticky notes, you can also press CMD + A (Mac) or STRG + A (Windows) to select them all and pull them together using the Smart Align trick mentioned earlier.
5. Match the font size of sticky notes for better readability
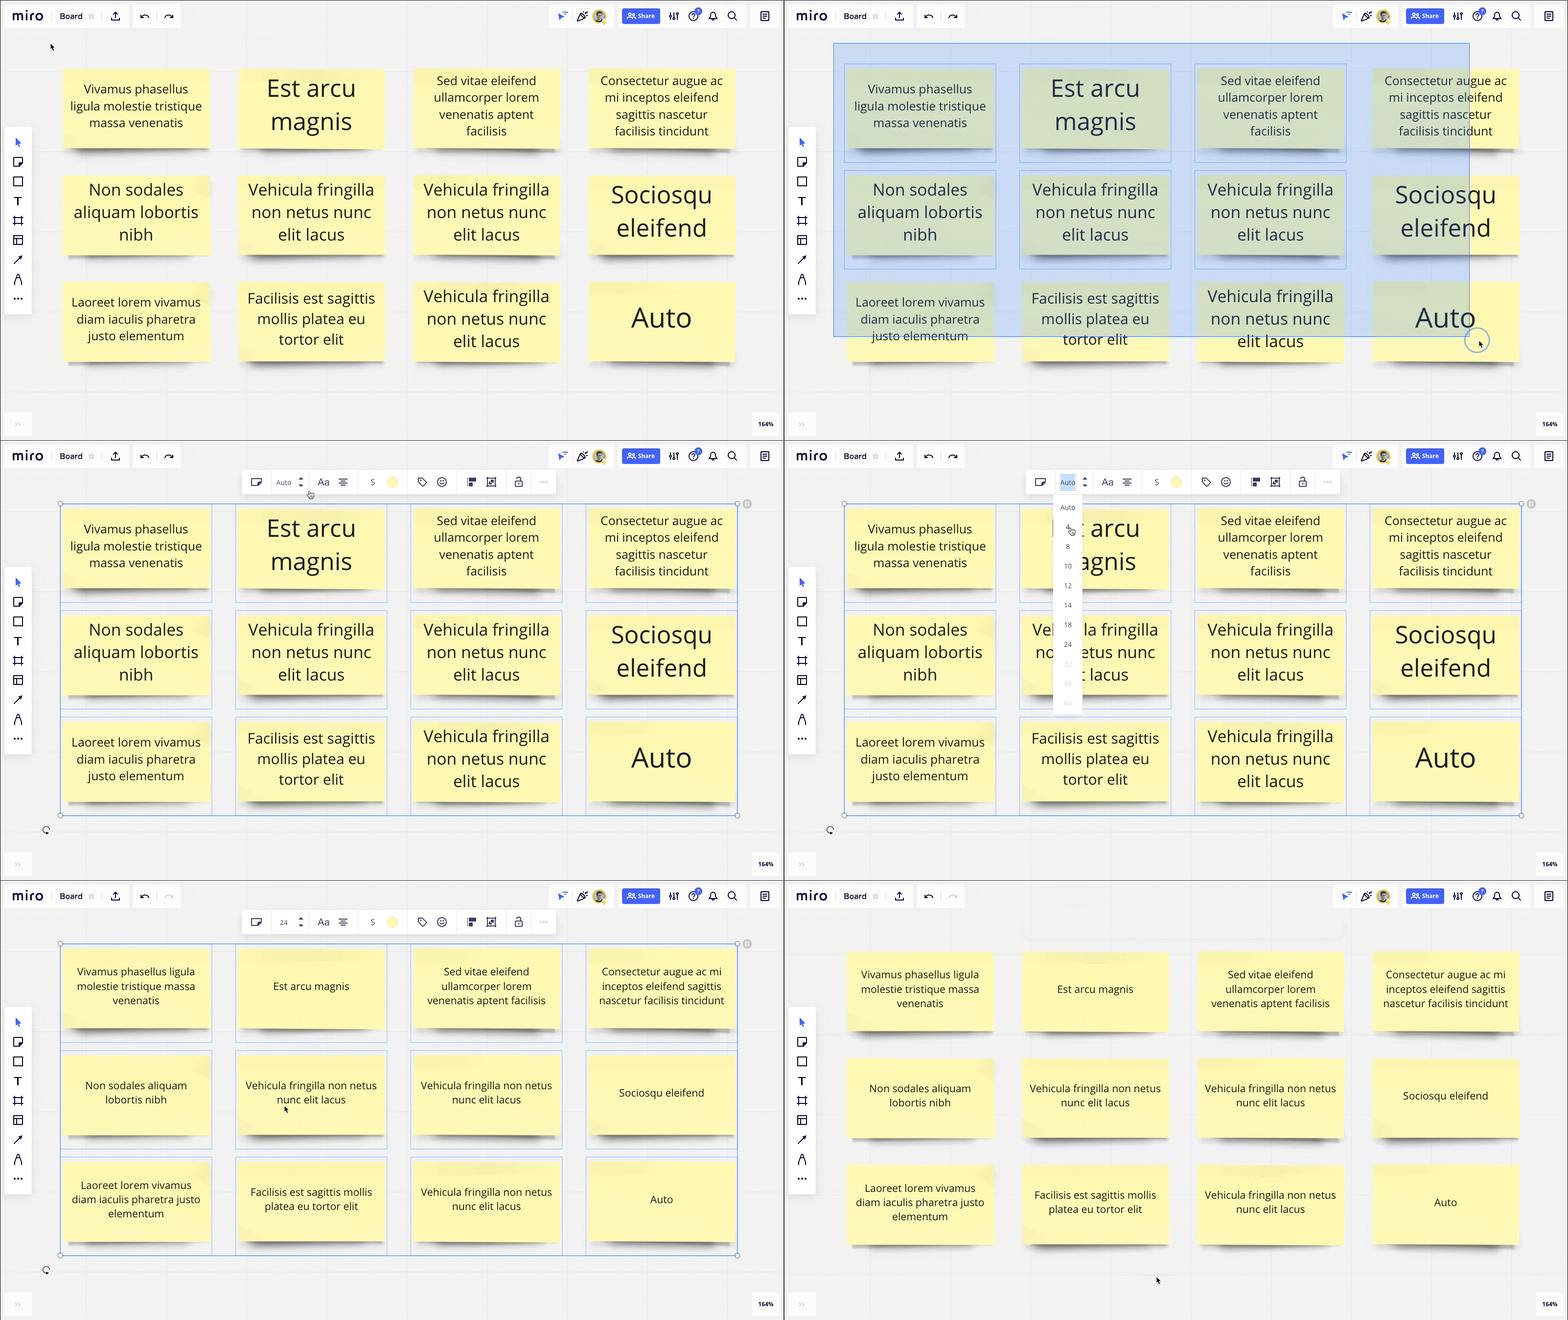
New sticky notes are always set to automatically adjust the font size while you write them. A single word on a sticky note will appear larger than, let's say, a full sentence. That means, that there can be large differences between the font size if you look at multiple sticky notes. This makes them hard to read if you have a lot of them clustered together.
To solve this problem, select all sticky notes and click on the font size input in the widget toolbar. As mentioned, it should be on "Auto" for all sticky notes. Now pick the largest available font size, that is not grayed out. This will bring all of your sticky notes to the same font size and make them easier to read!
6. Use "S" as your default sticky note size
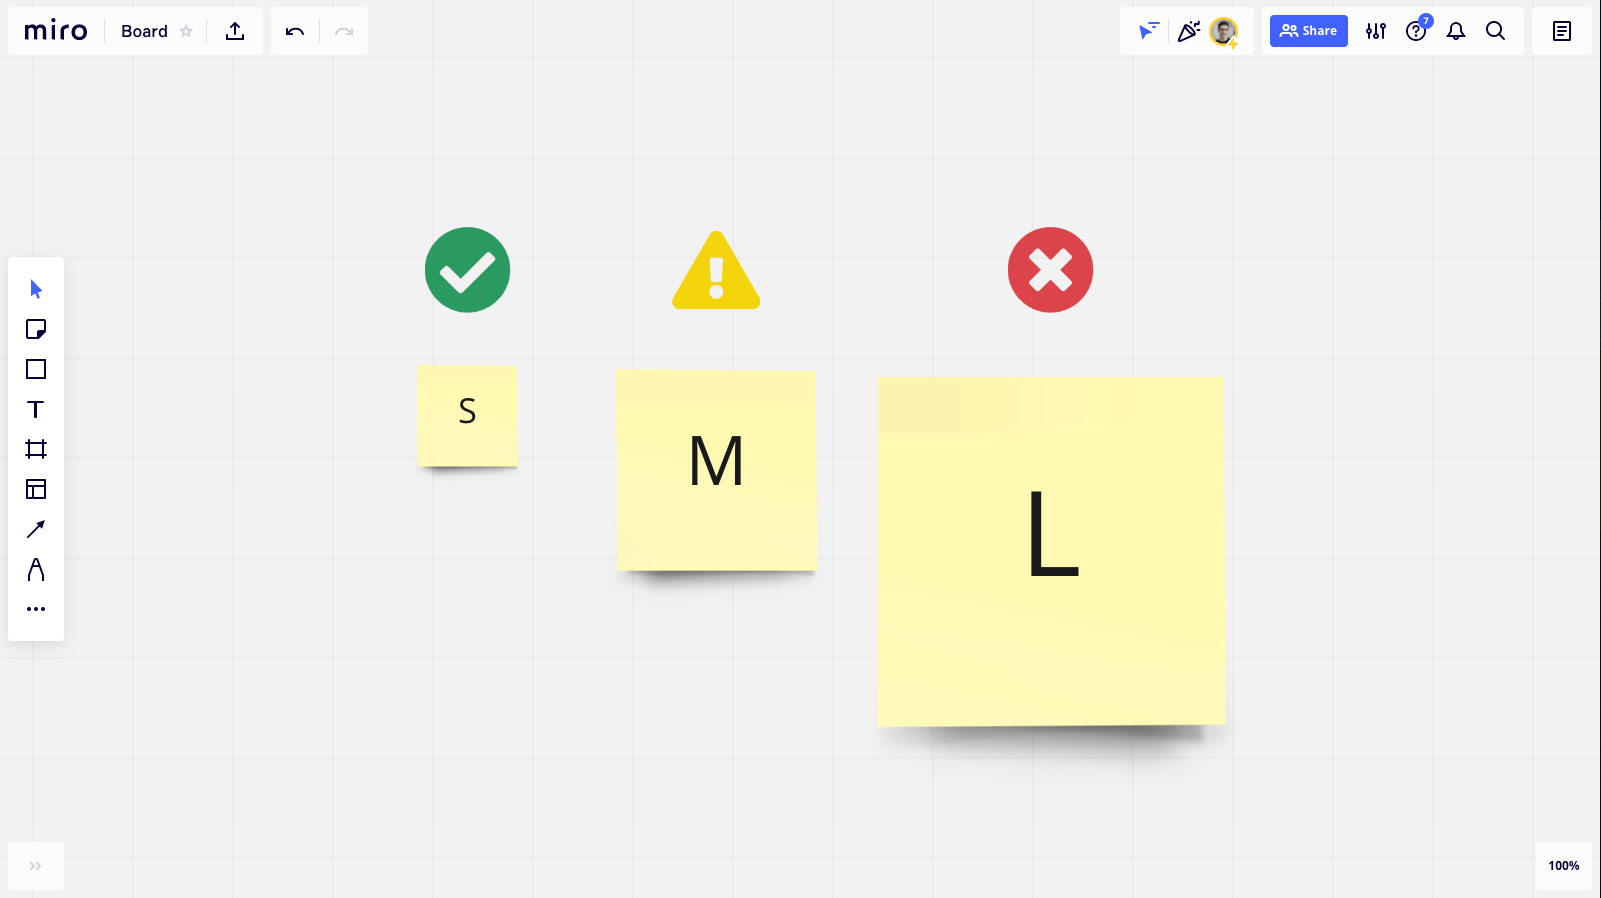
There are three sticky note sizes in Miro: S, M, and L. But you also have the freedom to size every sticky note to whatever size you like to. That's great, but can also be confusing. It's better to choose one size and then just stick to it – pun intended. But what is the right sticky note size?
We recommend using "S" as your default sticky note size. And there is a simple reason for it: If you open a new Miro board, it will have a 100% zoom level per default. And on 100% zoom level, S just naturally feels like the right size. M will be slightly too big and L just looks like a gigantic billboard. That makes "S" the right size to use.
7. How to pick the right sticky note color
In Miro, you can choose between 16 different colors for your sticky notes. If you like it colorful, go ahead and use them all. But be aware, that using too many colors on the board can give participants a hard time.
At Facilitator School, we like to keep things simple and focus on what would be best for the participants, and collaborates on the board. And therefore we follow a simple rule of thumb:
Light colors for unordered information (e.g brainstorming ideas)
Strong colors for ordered information (e.g ideas clustered by topic)
If you follow this rule, sticky note colors are not only for decoration. With the right colors, you can communicate information and help participants on the board to better understand what they are seeing.


.jpg)